
[ad_1]
Dylan George created a collapsible surfboard due to 3D printing. Find out about his course of and the way 3D printing can improve your hobbies.
Posted on November 3, 2016
by
Visitor Contributor Dylan George
Individuals who journey often know that airways can gouge you for the price of over-sized baggage. I do know this all too properly as a result of I journey with my surfboard so much. I wanted to discover a solution to reduce the price of touring with my board, in addition to the inconvenience of hauling it by way of airports.
I made a decision to cut my board aside into three items (loopy) and use my Ultimaker 2 Prolonged to design fixtures to reattach it. It was a dangerous concept, but it surely undoubtedly paid off due to 3D printing.
Beneath is my step-by-step course of in creating the collapsible surfboard, from CAD to meeting. All in all, the undertaking took about 60 hours to finish.
CAD
The CAD recordsdata have been purposefully made to simply accept a variety of board varieties by remaining generic in kind. All purple highlighted areas in [Figure 1.0] are current to assist in meeting and might stay or be eliminated (relying on desire).
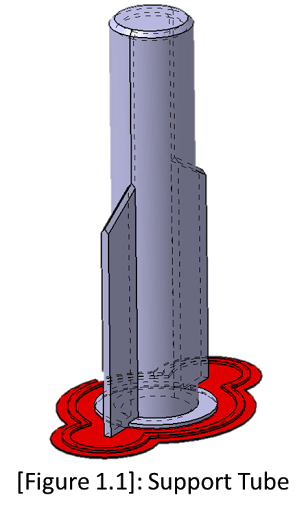
All purple highlighted areas in [Figure 1.1] are supposed to be eliminated after printing.
The undertaking requires 4 x Assist Tubes and eight x Bolt Guides.
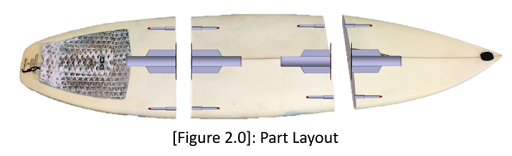
The place of every 3D printed half is printed under in Determine 2.0.
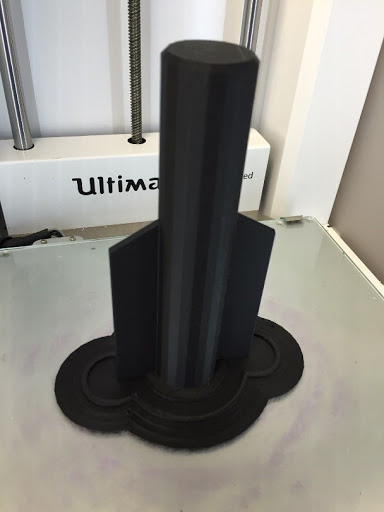
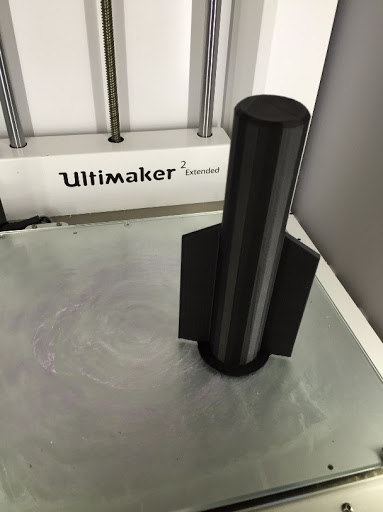
The components have been printed in MatterHackers PRO Sequence ABS filament on the Ultimaker 2 Prolonged. Listed here are some photographs earlier than and after trimming.
Supplies You will Want for Meeting
- 1 yard fiberglass material
- 1 quart epoxy resin
- PVC noticed (tough sq. file would work too)
- Angle grinder with flap disc
- Dremmel
- 120 grit sand paper (5 sheets)
- ABS filament (Nylon X can be used for model #2)
- Security glasses and painters masks
- 1 x exhausting exterior suitcase (Bought $20 at thrift retailer)
- Both line with foam or use your cloths for you journey to pad your board
The Course of
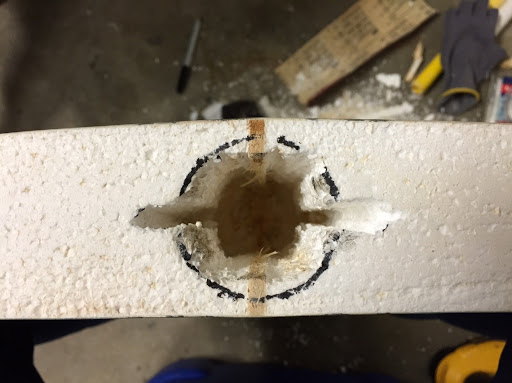
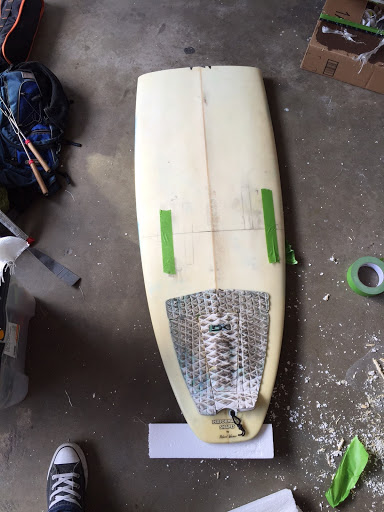
Use the forstner bit to create the primary gap for the assist tube. A PVC noticed can be utilized to create the grooves for the fins.
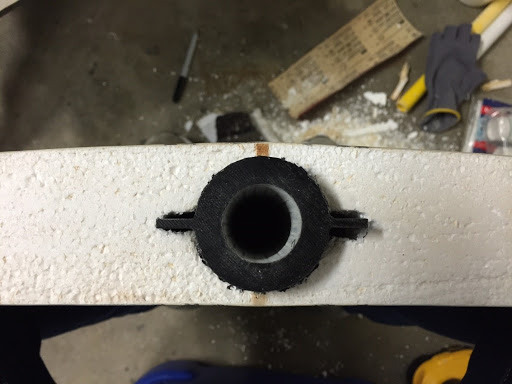
Dry match the assist tube in place and trim any portion of the print that sticks up out of the floor of the froth.
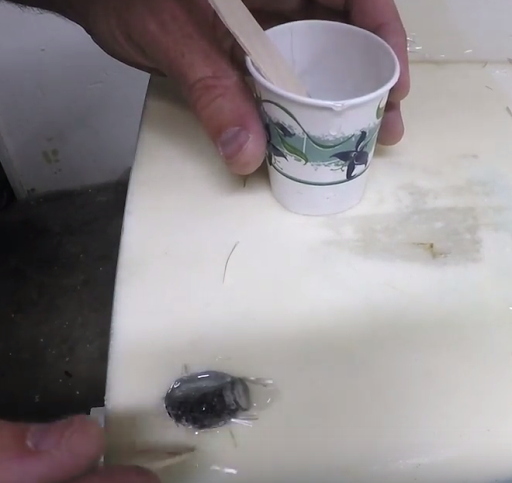
Fiberglass each mating assist tubes in place with a minimal quantity of fiberglass and resin. You solely need to use sufficient to carry the items in place.
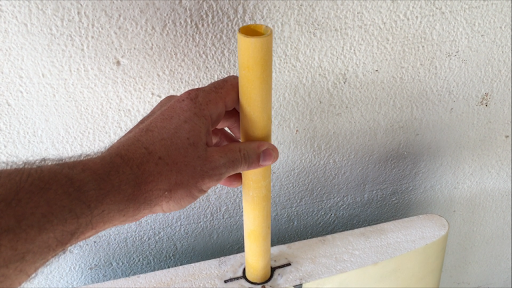
Insert fiberglass rod into each items to assemble the 2 thirds.
Align the 2 items with the rod in place and maintain along with painters tape. Chances are you’ll must assist the 2 items to maintain them aligned whereas the resin dries. As soon as dry, you may separate the items and end fiberglassing the the inserts in place.
Take these identical steps for the third piece of the surfboard.
Now you’ll want to complete the fiberglass work to seal the board ends that you simply created when reducing the board into three items. This isn’t any completely different than regular fiberglass work so I’ll skip this half.
Utilizing the alignment from the assist tubes, drill a gap from roughly a forty five diploma angle from the highest floor of the board and about 50 mm from the rail. You will want to drill 4 of those holes. The bottom line is to attempt to drill immediately by way of the center of the mating surfaces.
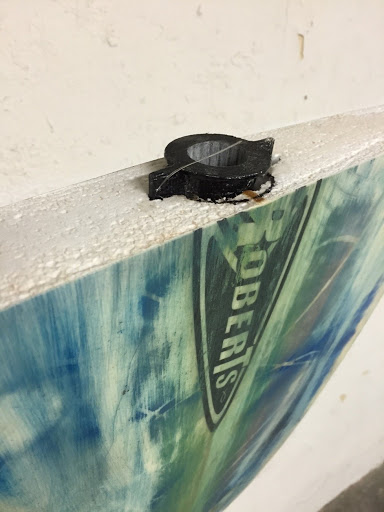
Assemble the T-nuts onto the bolt information and seal the connection by wrapping a small strip of painters tape between the T-nut and the bolt information. Subsequent, fiberglass the daring guides in place at your required angle. The bolt guides are purposefully lengthy in order that they stick up out of the board to be able to keep away from resin dripping into the information. When the final layer of fiberglass is dry, trim off any extra print materials sticking up above the floor of the board.
Notes
Take your time. This can be a very troublesome undertaking and isn’t really helpful to anybody who doesn’t really feel snug with detailed fiberglass methods. Bear in mind, you could simply break your favourite surfboard (I positive may have ruined mine had this not labored or had I botched my glass job). I’m a newbie 3D Printer, however proficient with fiberglass work. You don’t want a 3D printer to do that undertaking, however by using the advantages of 3D printing, all of the mating components are good and solely took a number of hours to print slightly than days to manufacture. That is a fully superb profit to utilizing a 3D printer: Dependable and correct execution.
All in all, the undertaking took about 60 hours to finish in 7 days…it was an extended week. Nevertheless, I wish to assume the reward was value it! Now I can take my favourite board with me anyplace and by no means pay a baggage payment once more!
[ad_2]

